Monday, April 19, 2010

The Light at the End of the Tunnel

Hotel life is almost at a close. I can't really say I'm going to miss it. Japan has been cool, that I'll miss, but I'm looking forward to hanging around my own house and sleeping in my own bed. Oh, and showering in my own shower.
Compared to most, though, my room is quite spacious. I have a kitchen. Here, I'll show you.Pretty sweet, huh? That white pitcher-looking thing actually boils water. I didn't take a picture of them, but I also have a small fridge and microwave. Between hot water and a microwave the gourmet possibilities are endless.

There is no shortage of entertainment possibilities either. I have one of the few rooms that has a couch from which you can enjoy your favorite programs on the nice flat screen TV provided. There is one whole English channel to watch. It's CNN. But when I say it's English, I mean England English. Plus it is updated at an astounding rate. You might watch some headlines on it and four days later watch again only to find a new set. They really spare no expense.

I did manage to pull myself away from the entertainment for a while, however. Since I had my computer I was able to watch some conference. When I'm at home I like to build a puzzle during conference because it keeps my mind aware (so I don't nod off) but I can still pay attention. So I figured I'd find a puzzle. I didn't have to look hard because they had some at the NEX. After I bought it, it occurred to me that I might not have a surface large enough to put it together. At home I always have my card table so I didn't even think about it. Well fortunately the desk was large enough. Here it is about done.Speaking of puzzles, this weekend we had a bazaar on base. They have one of these twice a year and you can buy all sorts of cool stuff. One of the cool things I bought was this little wooden puzzle. My family will appreciate this because I remember when I was a kid my dad had a few of these little wooden puzzles and one of them looked just like this one. When I saw it I had to have it.

Anyway, back to the room. The real centerpiece of the room was the high tech toilet. Check this beast out.Before I came to Japan I had never seen a toilet with a control panel. To be accurate, though, it's actually the toilet seat that has the control panel. It's very advanced. Here's a close-up.From this panel you can control all sorts of ways of cleaning yourself up. Plus the seat has a little heater in it for added comfort on those midnight potty breaks. I actually saw a row of these in an electronics store. Maybe I can fit one in my suitcase.

Anyway, this Friday it's USA or bust. I can't wait to see Chelsea and Jake again.
Tuesday, April 13, 2010

More Fun with GIMP

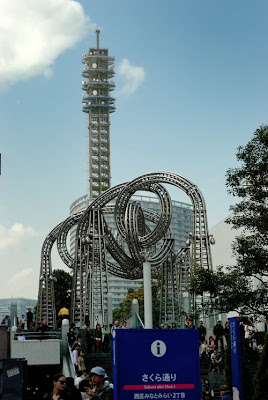
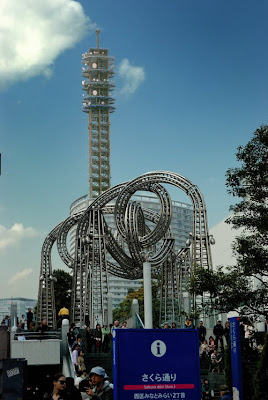
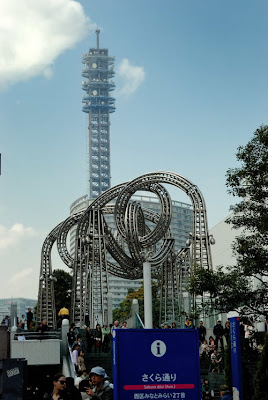
So here's another little project I've been working on with the time I have here in Japan. Check out this picture. I took it up at Queen's Square in Yokohama.
I like this big sculpture they had there. The picture looks good but there are two things that I would like to improve upon. I'd like to bring out the blue in the sky a little more and that tower in the middle is a weird color. I don't know why it looks so different than the other parts but it needs to be fixed. So here's how I did it.

First I tried editing it with Nikon Capture which is what I use mostly, but it didn't work out because of all the little sky peeking through the tower. So that's the challenge. I have to edit the tower without changing the sky inside it and then edit the sky without changing the tower. It's almost like I need to be able to mask it off. Hmmmm..... masking...... Oh, in GIMP there's this thing called layer mask. This is how it works. You start with a background of the main image, then you make copies of that image and overlay them on the background. Then you use this layer mask to make only certain parts of the overlays visible. That way you can edit each part separately. Finally you show all the layers with their layer mask applied and you are left with the final image. This will make sense shortly.

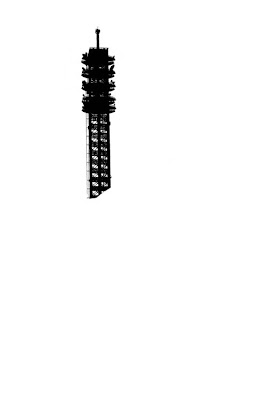
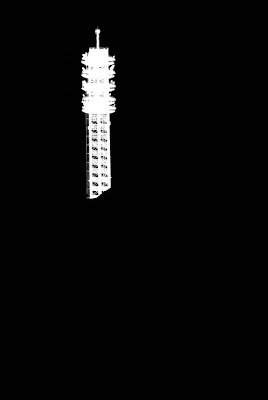
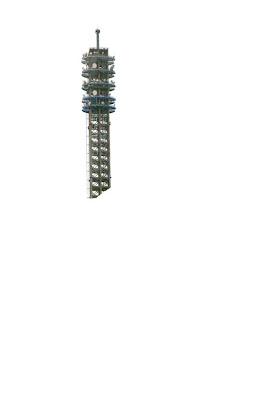
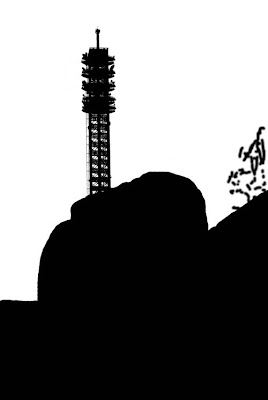
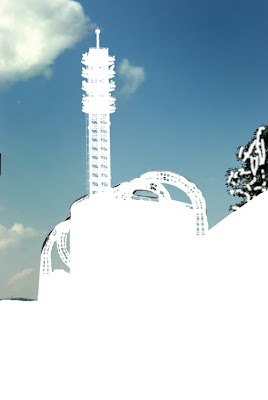
First I have to make that mask of the tower. I use a tool called threshold that turns everything white and black. Here's the result. Now I've isolated the tower, but it needs to be the other way around. Using the invert command I get this:At this point, remember I made an overlay that looked like the original picture. I need to apply the layer mask to the overlay. The point of the layer mask is that part of the layer is visible and part is not. Where the layer mask is white, it shows the layer. With the layer mask applied it looks like this:In this view I've already changed the colors. I wanted it to look more gray rather than blue. It's easier to see the difference when the image is all together. Here's the intermediate step. The tower is how I like it, and the sky is the next step. This is the new tower overlaid on the original background.Now it's back to the layer mask. I kept the white one from before so I could modify it. I had to exclude the lower part because I don't want to change that. Here's what the sky layer mask looked like.
And here's what the layer looks like with the layer mask applied:In this picture I've already edited the sky. I just changed the colors a little with color balance and curves tool. You can see all the little places where the sky is peeking through the sculpture and the tower. So here's the final picture. I like how it turned out.
I hope you enjoyed it. I tried to keep the detail to a minimum and I skipped some steps in the blog so if anybody has any questions feel free to ask for more clarification. Thanks for reading.
Here's a side-by-side to make it easier to compare.

Saturday, April 03, 2010

Fun with The GIMP

Today I've been playing around with The GIMP a little bit and I thought I would post my little project. GIMP stands for GNU Image Manipulation Program. It started out in the Linux computer world (hence the "GNU") but it's also available for us Windows users. I've been using it now for a few years, but since I finished school I've been able to spend much more time with it (sometimes to my wife's chagrin).

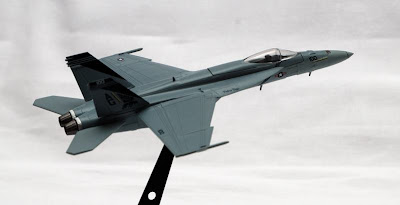
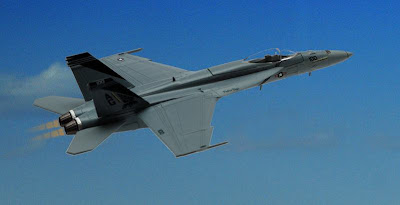
Yesterday I met a friend up in Tokyo and we went to visit a part of town called Akihabara. It's a famous electronics district. The place was amazing, but it's a post for another day. One of the stores we explored was a model store. They had lots of fun little models and I decided to buy one. It was a small model of an F-18 Hornet. I work for the Navy, and it's a Navy plane so I thought it might make a nice desk trinket.

After I got it home and started looking at it I was really impressed by the level of detail that it has. It was only 700 yen (about $8.00) and it's only about 5 inches long so I didn't expect it to be very realistic. After I put it together I thought it might be neat to take some pictures of it. I set up a little backdrop using a pillow case and took a handful of photos. Here's the one I chose for my project.Since I had taken the pictures with a white background I figured it would be pretty easy to replace the background with some sort of sky so that's what I set out to do.

The first thing I did was get rid of the little support piece at the bottom. That was no problem thanks to the clone stamp tool. Next I used a tool called threshold that makes everything turn black or white. It makes a nice outline of the airplane where the airplane is all black and the background is all white. Then I tweaked a little and made it a layer mask, which means that it would show the airplane but not the background.

The next step was to find some sky. Fortunately, I've taken lots of pictures recently here in Japan and lots of them include some sky so it was easy to find. I opened the sky picture as a layer, did some more tweaking, and before I knew it, had an airborne F-18.
I also added some cool afterburner.

Thanks GIMP!